
Easy Projects for Summer Fun
by Ellen Orr
When the heat of summer overtakes the excitement of the playground, engage your children in these DIY projects that they will love and you won’t mind them doing. These activities are not cost prohibitive, and you probably already have the supplies for most on hand. Sure to be a hit with the kids, the following crafts will bring smiles to all.
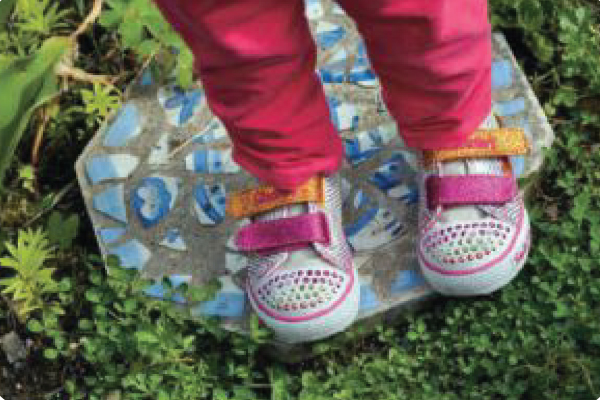
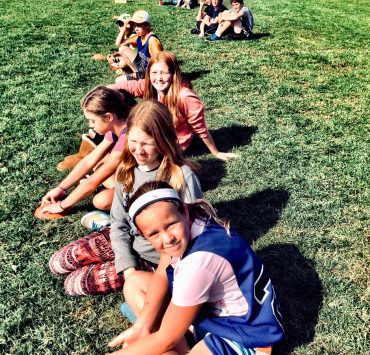
Stepping Stones
Pictured at top. On a hot summer day, put the kids in play clothes, drag out the water hose, and plop down in the backyard to make DIY stepping stones. After greasing them with vegetable oil, fill old cake pans with fast-setting concrete mix. Before the concrete has dried, let the kids press designs into the tops; you can use decorations from the craft store, broken dishes you need to upcycle, or even found objects. Your children can also use sticks to write in the concrete, as well as make handprints and footprints. In 24 to 48 hours, they’ll be ready to pop out of the pans and into the garden.
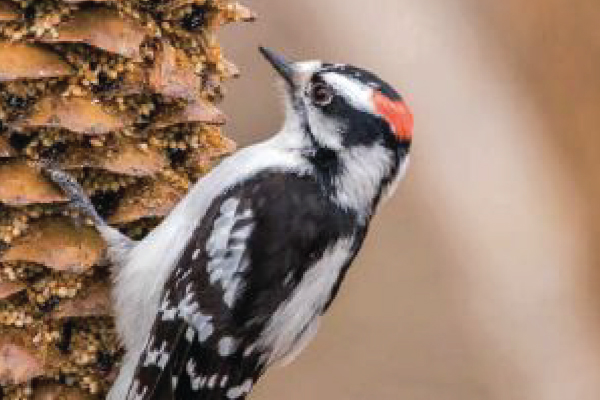
Pinecone Bird Feeders
First, have your children unknowingly do some yard work by collecting fallen pinecones. Once they’ve brought them inside, they can get their hands dirty by mixing together peanut butter or lard with oats or cornmeal, and then lathering the pinecones with the resulting mixture. Next, they should coat the sticky pinecones with birdseed. All that’s then left to do is to string up their new feeders to tree branches (preferably far away from the trunk as to prevent squirrel hijacks), pull out the John James Audubon, and wait for the birdwatching to begin.
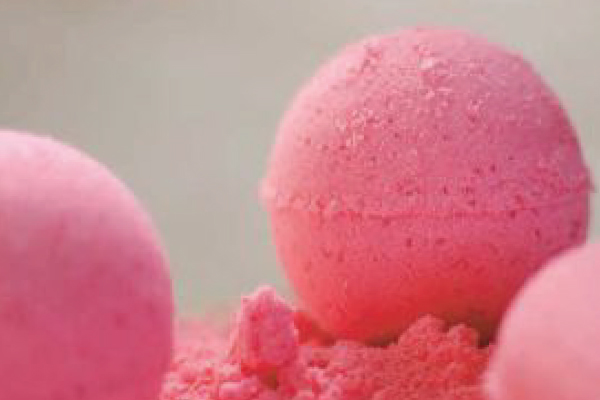
Bath Bombs
If your child loves getting dirty but resists bath time, this project is for you. A great lesson in standard measurements, this activity requires your child to mix 2 cups of baking soda, 1/2 cup of cornstarch, and 1/2 cup of epsom salt in a bowl. In a separate bowl, they will then mix 5 tablespoons of coconut oil and 2 teaspoons of water. Next, they should combine the wet and dry mixtures to create a crumbly substance. It is here that they can add in food coloring and essential oils, as desired. Then, pack the “dough” into tennis ball halves, a meat baller, or even a mini-cupcake tin. Let them set for 24 to 48 hours, depending on size, and then gently pop them out for a fuss-free bath experience.

Mason Jar Lava Lamps
You likely have on hand all of the supplies necessary to recreate the groovy lamps of your childhood. First, have your child fill about one-fourth of a mason jar with water, and then another two-fourths with vegetable oil. Next, add food coloring to your liking; glitter is a fun addition as well but not necessary. Lastly, let your child drop in Alka-Seltzer tablets (or similar antacid tablets), first slowly and then with more pace. Watch with astonishment as the carbon-dioxide bubbles rise through the oil. When finished, secure lid and store safely.

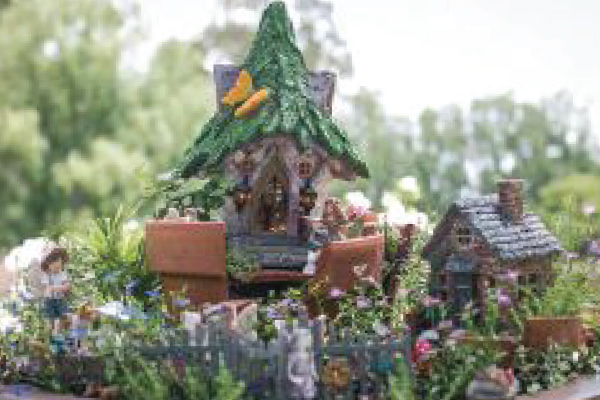
Fairy Houses
The age-old practice of building fairy houses inspires creativity and wonder. Using bought materials from a craft store, natural supplies, or a combination of both, your child will love playing architect and builder for the local fairy population. For a more permanent residence, your child can use Gorilla Glue, paint, and craft items to transform a planting pot into a fairy abode. For a transient fairy camp, no purchase is necessary: tents, beds, sidewalks, and more can all be made from items found in the yard. The possibilities are endless. Then, after a hard day’s work of construction, keep the magic alive by watching the 1997 film “FairyTale: A True Story,” which follows the real-life Cottingley children, who, in 1917 England, took a photograph once believed to be scientific evidence of fairies.
Trying any of these crafts with your kids? Share your creations by tagging Instagram pics with #txkparent or emailing them to [email protected]!